Sunday, October 6, 2013

My New Addiction!

 
Infused water is a new thing for me, and I see it more and more in the web. What I have notice is that some people call it infused water and others call it detox water; either way I love it and I know it's healthy.  This is my favorite recipe:
 
~purified water
~1 sliced lemon
~A handful of raspberries
~10 mint leaves
 
You just have to let it sit for a few hours (I let it sit over night) and it's ready!!!


QUE RICA AGUA!


Matteo is growing up!

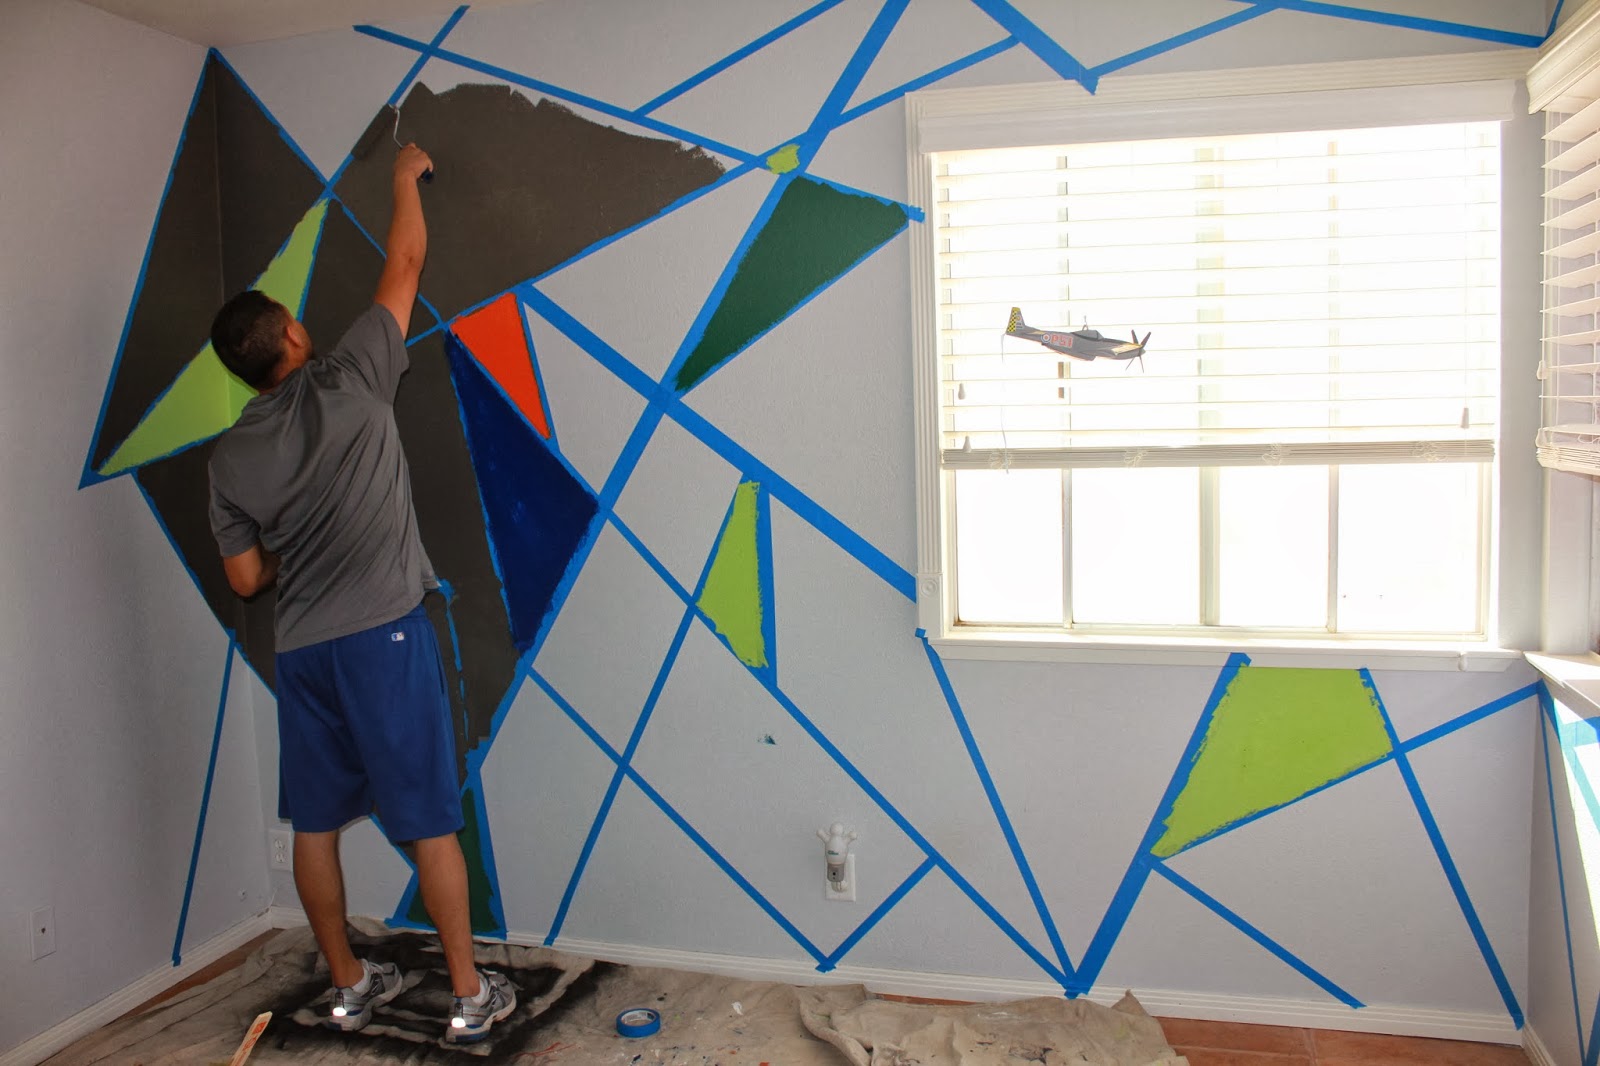
My little Matteo is growing up, and it really hit me when I had to take the crib out of his room and replace it with his cool car bed :( A bit sad but now I had a new project to tackle.  His bedroom had to grow up too.  I, like so many other people, looked for inspiration in Pinterest. I wanted something graphic and with color and we end it up with something that we all liked.  Here are the pictures of our weekend project.

He wanted to paint too, so he had his own painting project. 
 It was fun to see him getting paint all over him, but it was not fun when I had to clean him.
 Before we pulled the tape:
After pulling the tape:
He was relaxing and reading his book.  I soooo want to be him!
We also made a book ledge for all his books.  It was also a Pinterest idea!

Friday, August 23, 2013

Cute Little Flowers!

I am in love with this little flowers/pom poms. I learned how to make these from a YouTube tutorial a few months ago and decided to make them for my friend's baby shower.
I used them to decorate around the house and also to decorate the favors.
 
Very easy to make... it was easier than regular pom poms.
You will need tissue paper (any color). Since I wanted to mix textures and color, I used a paper bag and tissue paper. 
 
1. first I used the craft puncher to punch out 2 circles out of the paper bag and about 4 out of the tissue paper.
 
 2. Second step it's to layer them. I used 2 tissue paper, 1 paper bag, 2 tissue paper and 1 paper bag.  You can layer it how ever you want and you can try different variations.
Once you have it layered the way you want it, staple it all together from the middle.

3. Now is time to wrinkle it all up layer by layer.  You can see in my last picture how it looks when its all wrinkle.  The last step is to go pull the layers back and you'll see the textures that each layer will have.

 
 Here you can see the final product and how it looks in light pink, bright pink and yellow.


 Hope you like it!!!! ☺♥
Have a great weekend.

It's A Baby Shower!

Oh how I love to have an excuse to have a party at my house!!!
Few weeks ago we had a baby shower for my good friend and here are some pictures to show you what I did.  I decided not to post pictures of her since I don't know how she would feel about that.


First of all "The Invite" and the inspiration for everything to come.


Pastry Bar with a little bit of everything.
 
 
 The Favors: We gave a jar of body scrub and a small (flower shaped) hand soap (both I made at home)


I also thought of having a (sort of) photo station. I used my work corner to place several decorations that were turned into prompts. I also used a tray (painted the center with chalk paint) to have people write a messages.  I decided to do this last minute and it turned out fun.


I kept it simple with the center pieces.  A glass with an artificial flower on top, baby block (that I painted white with gold glitter) and pink candy in shape of a pacifier.


Tuesday, June 18, 2013

Entryway

Welcome to my house and here is my new bench. My house is a working progress and therefore I like to change things around every so often until it feels just right.  Now that I have this new bench at the entry I feel like we need to change our floors ASAP.  I have hate it these tiles but I know it's not in our budget yet to change the floors :/
There are so many other things around the house that I can add or change that I keep my self occupied anyways.

 
Now that I finish this project, off to the next one.☺


Friday, June 14, 2013

Fabric Options

I went to Jo-Anns and I walked though all the fabric aisles not knowing exactly what was I looking for.  I don't know why but I decided to look at the pre-order section and that was a big mistake. Why?? One because I need ONLY one yard of fabric, two because I was not willing to wait weeks for fabric to arrived and three because I knew, I just knew, I was going to see something I was going to like but could not have. Sure enough, I saw the perfect fabric but I couldn't have it. It was hard to stay away from thinking of that perfect fabric. I had to refocus and look for something that would give me the same feeling. These were my options.


All these fabrics are from HGTV collection.
 
1. The black and white chevron was my first choice but I wanted to add some color.
2. These is the pre order fabric and my favorite, but had to step away from it. (for now, I will be back for you)
3. Love the colors and shapes.
4.This fabric has the same colors as #3 but in a bit more modern way and the green pops up more.


No. 4 is the winner!!! I'm planning to finish it today. Yay! Next post I will have the pictures of the end product.

Happy Weekend.

Wednesday, June 12, 2013

DIY

Yesterday, I went to my mom's house and found this old bench outside in her patio, and I loved the legs but not so much the fabric. I mean, come on! That fabric has seen better days. So my mind started turning with ideas on what to do with the bench. I wasted no time and started pulling staples from the back and sanding the wood. I first thought of painting the legs a flat black, but I hold my self back because I have not yet seen fabric options. So today I will be going to Jo-Ann to look for fabric options. This is a work in progress and I'm super excited for the possibilities.